STEP !:

Open Photoshop and create a new document. I used 1920x1200 pixels. Then apply a gradient. I applied a Layer Style, Gradient Overlay instead of a gradient fill. Use Radial for the Style and #07090a and #202b35 for the colors.
STEP 2:
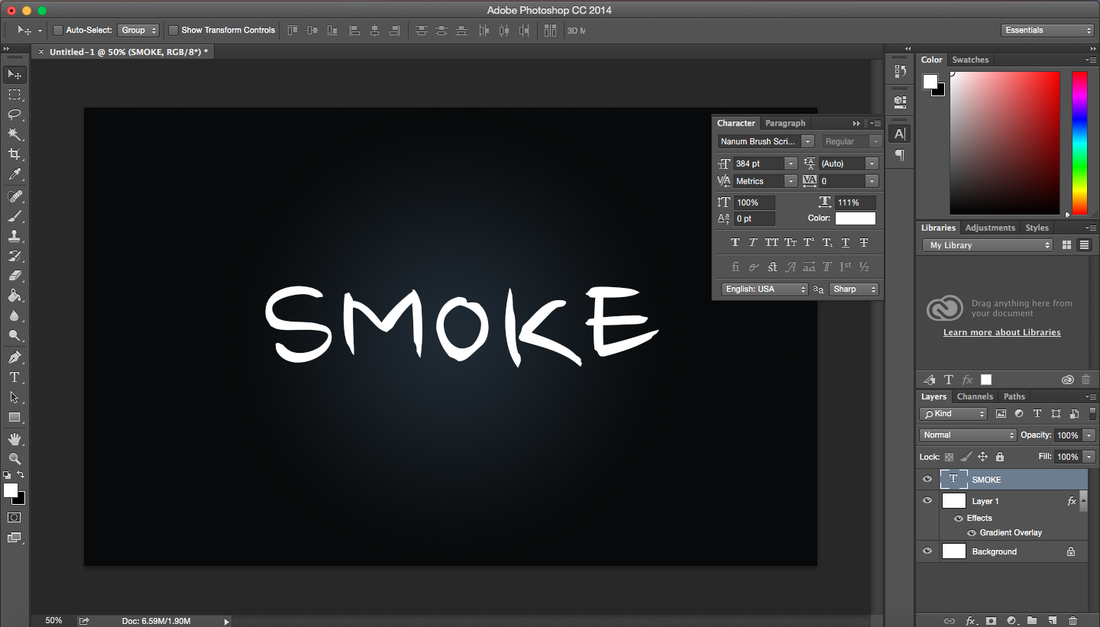
Add some Text in white, I used Nanum Brush Script Regular, and set it at 384 pt with the Horizontal Scale at 111%. I also used the word "SMOKE".
STEP 3:
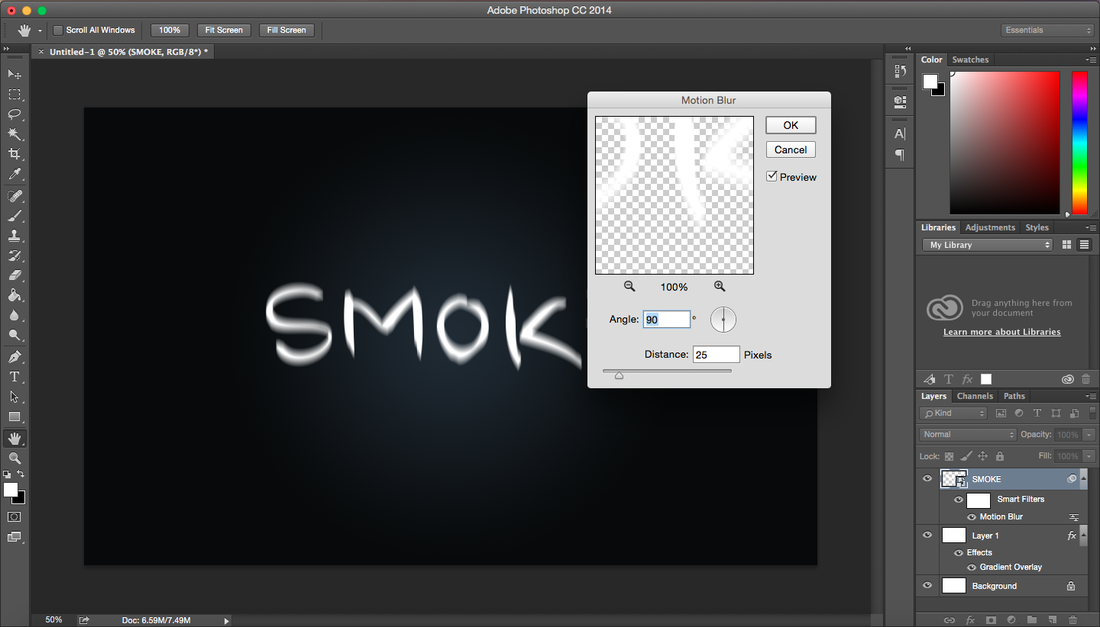
Go to Filter>Blur>Motion Blur. Use 90º for the Angle, and 25 pixels for the Distance.
STEP 4:
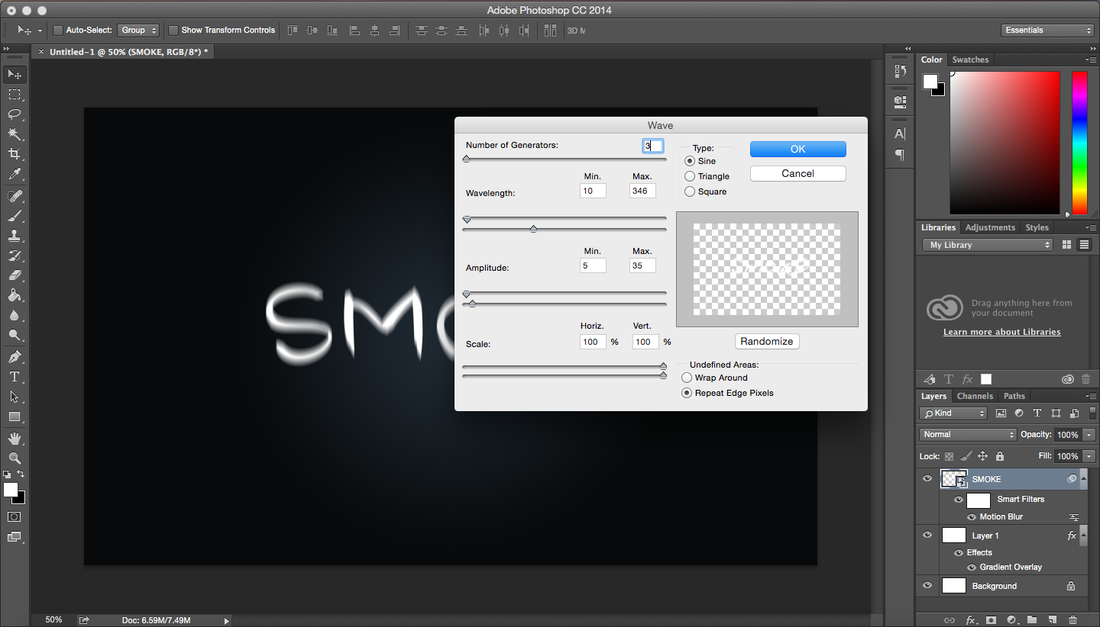
Now go to Filter>Distort>Wave. Use 3 for the Number of Generators, 10 and 346 for the Wavelength, and 5 and 35 for the Amplitude.
STEP 5:
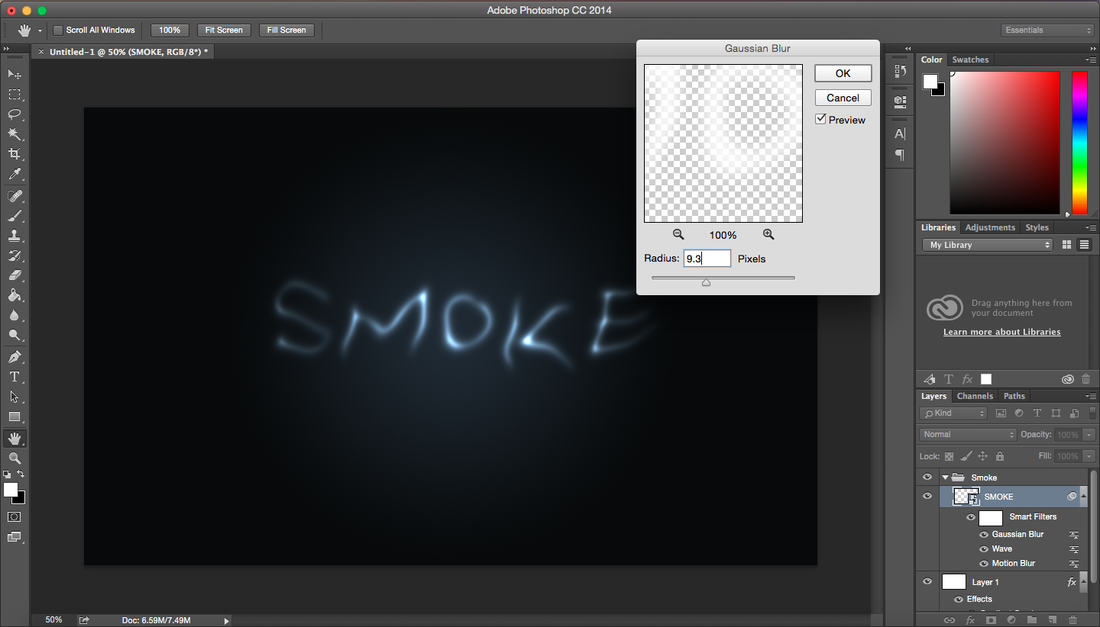
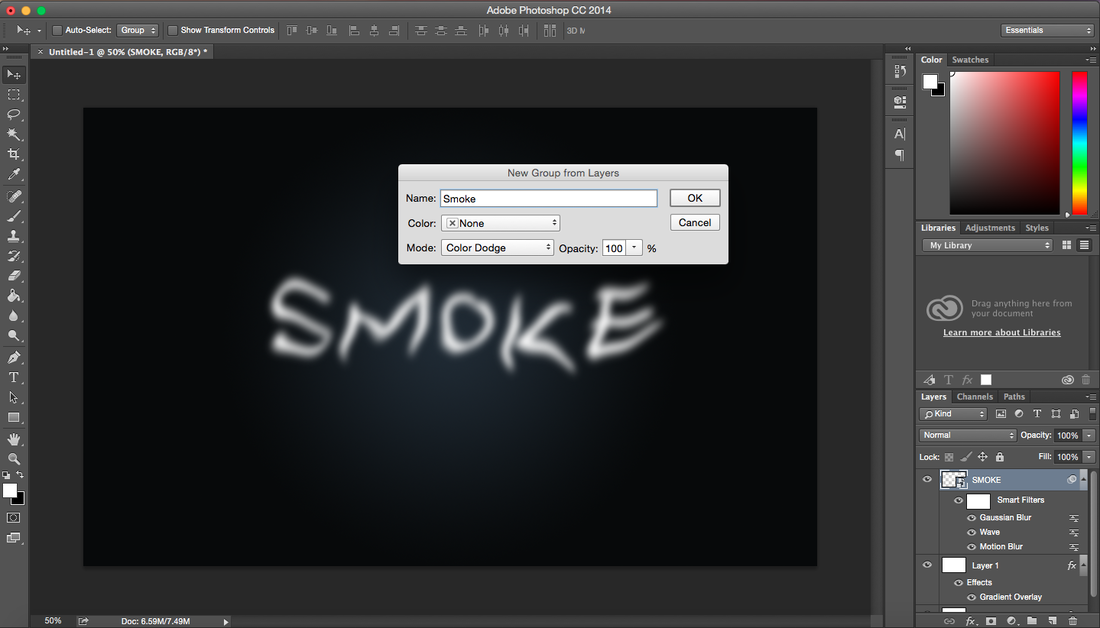
Go to Filter>Blur>Gaussian Blur. Use 9.3 pixels for the Radius. Then group the layer and rename the folder's Blend Mode to Color Dodge. This gives a nice light effect
STEP 6:
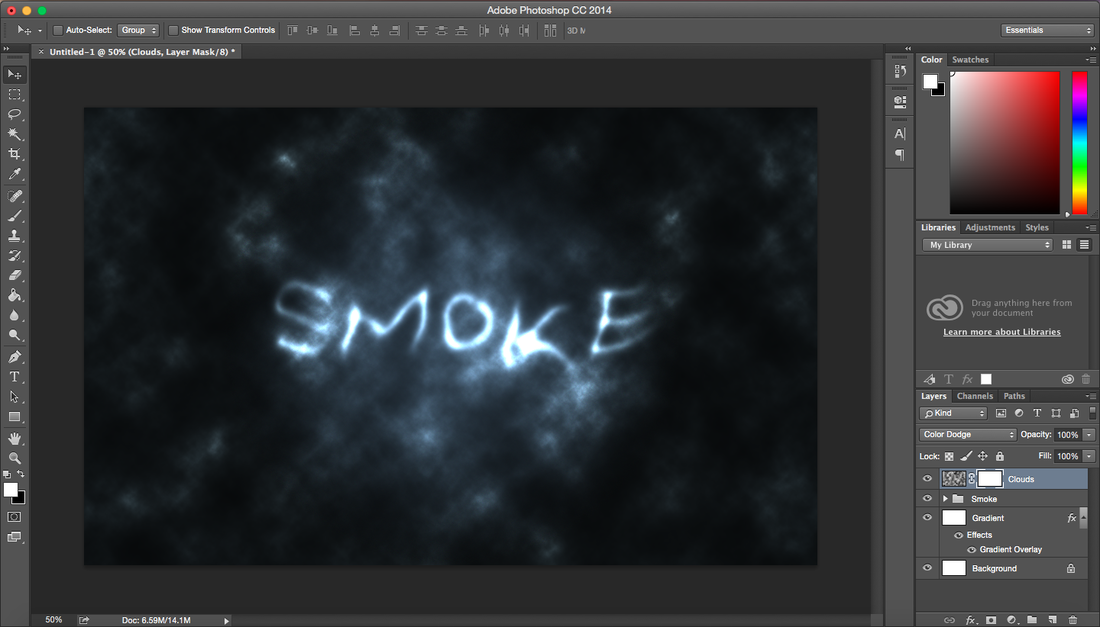
Create a new layer on top of the others and go to Filter>Render>Clouds, make sure you had black and white for the background and foreground colors then, change the Blend Mode to Color Dodge and go to Layer>Layer Mask>Reveal All.
STEP 7:
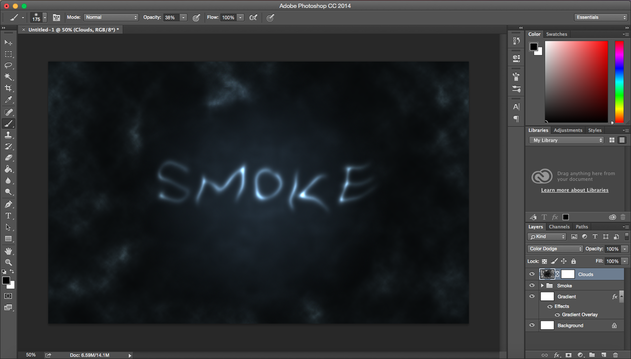
With a very soft brush, 0% hardness and black color, hide some areas of the clouds layer.
STEP 8:
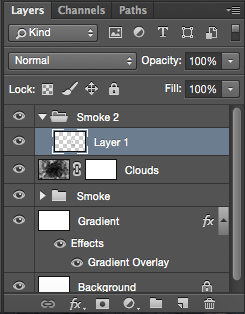
Create a new Group. Change the Group's Blend Mode to Color Dodge and add a new layer inside of it.
STEP 9:
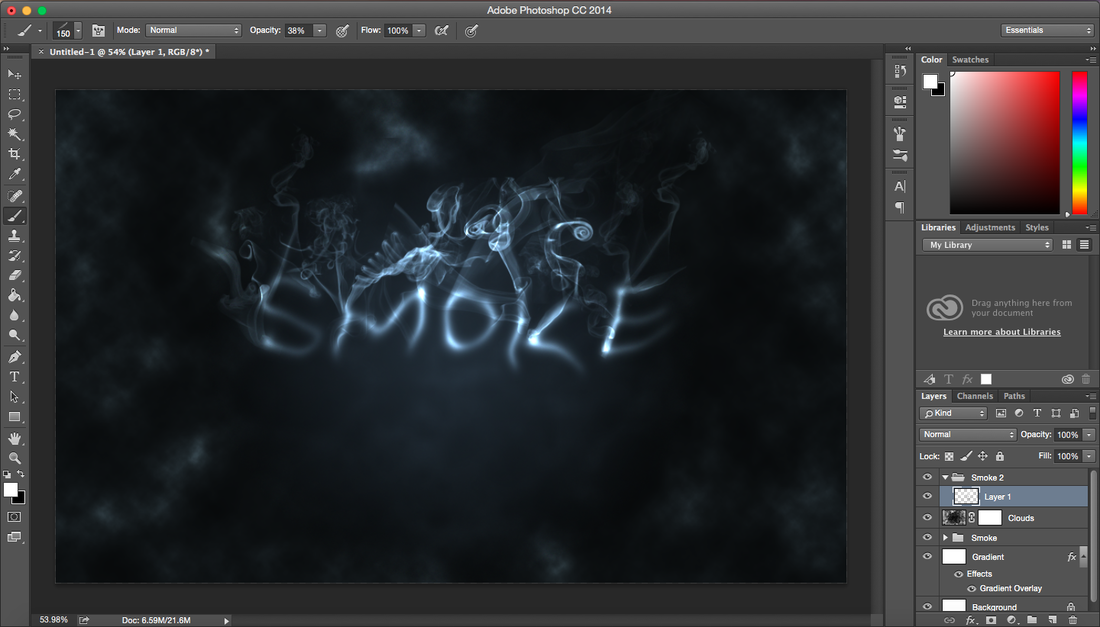
Then use the Smoke Brushes from Qbrushes . Select white for the color and paint over some letters. If the brush doesn't apply as bright as you want, just click again.
STEP 10:
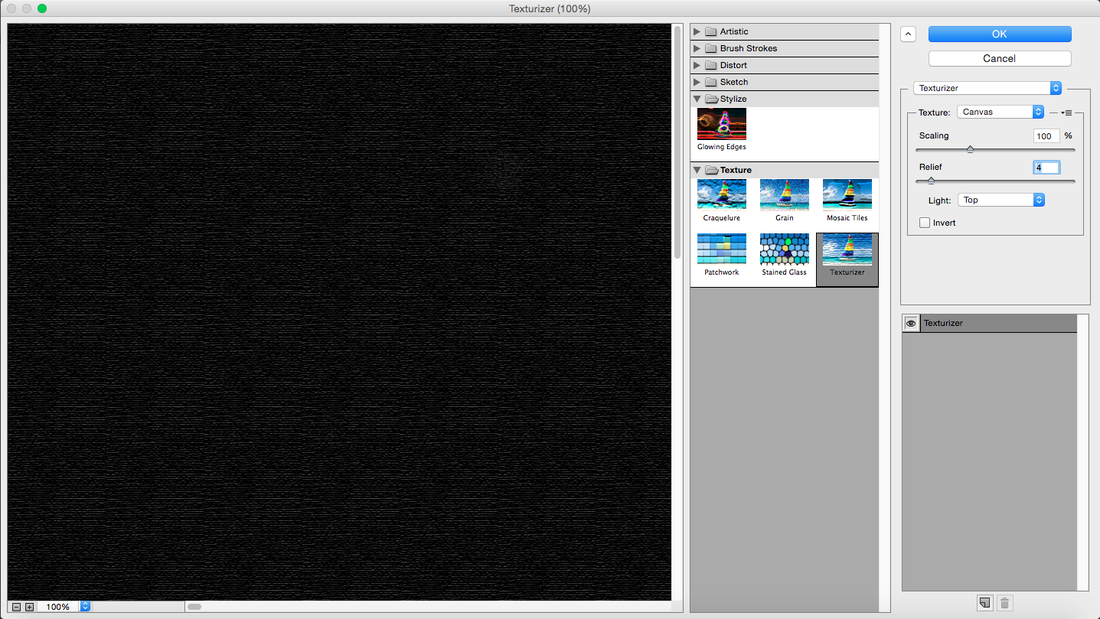
Create a new layer right before the Background layer and fill this with black. Go to Filter>Filter Gallery>Texture>Texturizer and use 100% for the Scaling and 4 for the Relief. For the Texture use Canvas and for Light use Top. That will add a nice texture to the image but you will need to change the opacity to 10%.
FINAL STEP:
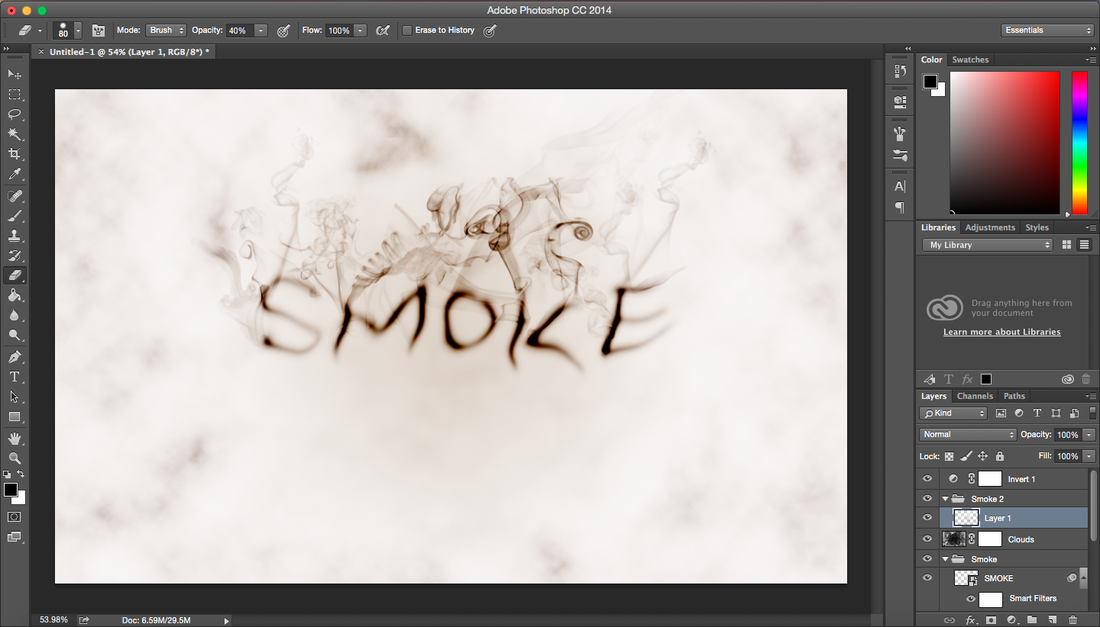
Ontop of all of the other layers, add the invert adjustment. Go to Layer>New Adjustment Layer>Invert.
 RSS Feed
